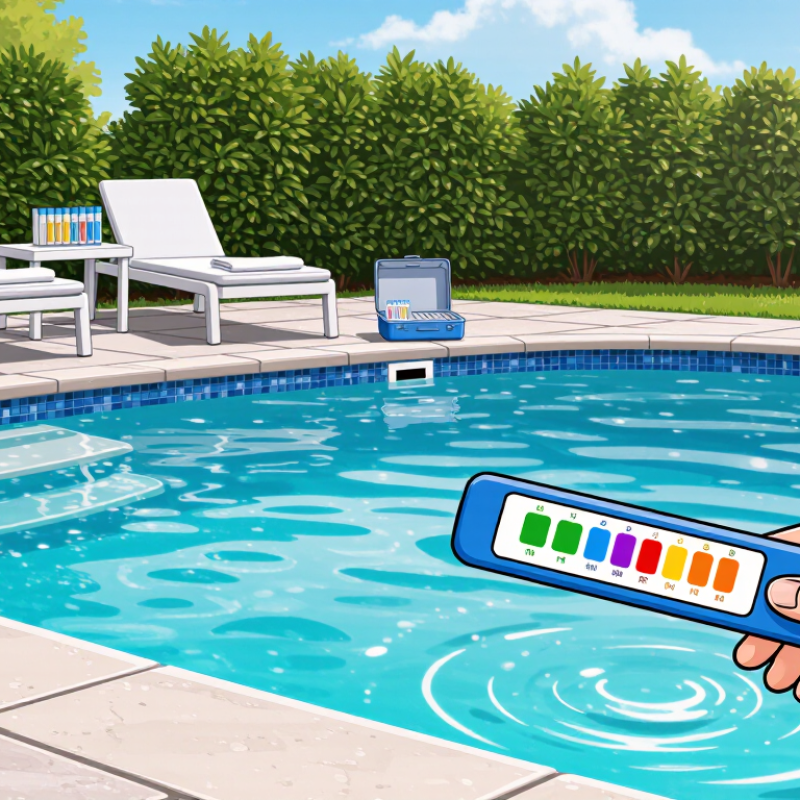
Even if a pool looks crystal clear, it doesn't necessarily mean everything's perfect underneath. Back in 2018, the CDC did a review of public aquatic-venue inspections, and guess what? About one in eight routine inspections led to immediate closures. Now, that data is just for public pools—not home setups—but it really drives home why Water Testing is so important. APool Water Tester can make those invisible chemistry imbalances way easier to spot and deal with.
The CDC suggests keeping your pool’s pH between 7.0 and 7.8, and most pools should have at least 1 ppm of free chlorine. But here's the thing—how often you test matters. Things like sunlight, rain, how many people are swimming, and even adding chemicals can change your test results pretty fast. Whether you grab a quick test strip or go with a liquid kit or a digital meter, each has its own pros and cons—none are perfect. And even the best tester can give you misleading info if it’s expired, stored poorly, or used incorrectly.
When you're choosing a tester, don’t just go for the cheapest option. Think about what chemicals it measures, how easy it is to read the results, how often it needs calibration, and if replacements are easy to find. We’ll go over seven simple tips—like matching your tester to your pool routine, checking its accuracy, and making sure it’s easy to use. Little things really do matter — for instance, a faded color chart next to a bright outdoor pool is tough to read. Pick a tool that fits your lifestyle, follow the instructions, and double-check unusual readings before making big changes. It’s all about staying on top of it, little by little.
Choosing a pool water tester starts with understanding your pool’s actual chemistry needs. A basic freshwater pool usually requires pH and Free Chlorine Testing. These measurements show whether the water may irritate skin or support unwanted growth. Many owners also need total alkalinity, which helps stabilize pH and reduce sudden chemical changes.
Saltwater pools require salinity testing as well. Calcium hardness matters more in plaster, concrete, and tiled pools because unbalanced water can encourage scaling or surface damage. Cyanuric acid is useful for outdoor pools using stabilized chlorine. It protects chlorine from sunlight, but excessive levels can reduce its effectiveness. Check your water source, surface material, sanitizer system, and local guidance before buying a tester.
Do not pay for every available measurement. That gets confusing. A tester should match your maintenance routine.
In practice, Test Ph and sanitizer levels more often than calcium hardness or metals. Test after heavy rain, major water replacement, or unusual water cloudiness. I have seen pool owners trust one reading without checking the test method, storage conditions, or expiration date. That is an easy mistake. Compare unclear results with a second test, and record changes over time. Reliable decisions come from patterns, not one dramatic number.
7 Tips for Choosing the Best Pool Water Tester
A Pool Water Quality Tester should match your routine, not just your budget. Test strips are quick, portable, and useful before a morning swim. However, color blocks can look different under cloudy light. Liquid kits usually provide clearer readings for chlorine, pH, alkalinity, and hardness. They require clean sample containers and careful drop counting. Small technique errors still matter.
Digital testers display numerical results within seconds. They can reduce color-matching confusion, especially for users with poor color vision. Yet sensors need calibration, clean storage, and fresh batteries. A dirty probe can produce a confident but incorrect answer. I have trusted a digital reading too quickly before. That was my mistake. Keep a liquid kit nearby for cross-checking unusual results.
The CDC’s 2022 MMWR report reviewed more than 84,000 routine inspections from 2015–2018. About one in eight inspections led to immediate closure because of serious health violations. The CDC’s Model Aquatic Health Code also recommends testing disinfectant and pH before opening and throughout operating hours. Choose a tester that supports frequent use, records results, and measures the parameters required locally. For a busy public pool, combine strips for rapid screening with a liquid or digital method for confirmation. For home use, consistency may matter more than laboratory-level precision. Read the instructions every time. Human habits are rarely perfect.
Accuracy is the first filter when choosing a pool water tester. A reading can look precise and still mislead you. I once trusted a digital meter that displayed two decimal places. Its result changed after one rinse. That assumption was wrong. Look for stated accuracy, repeatability, and calibration instructions, not attractive screen numbers.
The tester should cover the ranges your pool actually needs. CDC Healthy Swimming guidance places pool pH around 7.0–7.8 and recommends at least 1 ppm free chlorine. The 2023 Model Aquatic Health Code commonly uses 1–4 ppm for pools. Choose a tester that measures beyond these limits, such as 0–10 ppm chlorine and pH 6.0–8.0. A narrow range may hide an unsafe spike. Wider is not always better, though. Some low-cost devices lose resolution across broad ranges.
Check the test method against professional guidance. The World Health Organization’s Guidelines for Safe Recreational Water Environments emphasizes controlling disinfectant and pH together, because pH affects chlorine performance. For field work, compare a new tester with a certified reference solution and record both results. Do this in daylight, with clean cells and fresh reagents. Small habits matter. Temperature can also affect electronic readings, but many users forget it. I do sometimes. Select a tester with clear temperature limits, calibration checks, and documented performance data. A trustworthy measurement is repeatable, understandable, and suitable for the water range being tested.
Choose a Swimming Pool Water Tester with controls you can understand at the poolside. A clear screen, large digits, and plainly named readings help prevent mix-ups. Check that it measures the levels you need, such as pH and sanitizer. Fewer menus help.
Check readability in bright outdoor light, not just indoors. Glare can make small numbers hard to distinguish. For test strips, look for a color chart with distinct shades and readable labels. Keep the chart dry and close by. Easy to overlook.
Follow the instructions for sample depth, wait time, and rinsing. These details can affect a reading. Note the units, and try to test at a consistent time of day. If a result seems surprising, repeat the test before adjusting the water. The routine can feel fussy, but skipping a step may undermine a simple test.
Check reagent availability before choosing a pool water tester. A kit may seem affordable, but replacement drops or tablets can be difficult to find. Look for clear instructions on compatible refills, shelf life, and storage. Expired reagents may give unreliable readings, even when the test steps seem correct. Check the date before opening each bottle, and write the opening date on its label. Small detail, big help. Reagents from different test methods are not always interchangeable, so confirm compatibility rather than guessing.
Maintenance matters, too. Choose a kit with a sturdy case that keeps bottles upright and protects them from sunlight and damp storage areas. After testing, rinse the sample tubes with clean water and let them dry before packing them away. Keep caps tightly closed, and replace cracked tubes or faded color charts. Digital testers may need clean sensors or periodic calibration; follow the device instructions. It is easy to overlook a sticky cap or a wet case when putting everything away. I would still check the kit before the swimming season, because missing one small reagent can leave you without a usable test.
Use these practical checks to compare pool-testing methods, consumables, and upkeep before you buy.
| Tip | What to Review | Why It Matters | Maintenance Check |
|---|---|---|---|
| 1. Confirm reagent availability | Check whether replacement reagents for the specific test method are readily sold and whether individual reagents can be purchased separately. | A tester is less useful if a required reagent is difficult to replace or the whole kit must be repurchased when one item runs out. | Before buying, verify the reagent names, test range, and compatible kit instructions. Keep a note of where refills can be obtained. |
| 2. Check expiration and storage guidance | Look for clearly marked expiration dates and storage instructions on liquid reagents, tablets, or test strips. | Reagents can lose reliability over time. Heat, light, moisture, or air exposure may affect some products, depending on their formulation. | Store reagents as directed, keep caps closed, and replace expired materials. Do not assume all reagents have the same shelf life. |
| 3. Compare the tests included | Check whether the kit measures the water parameters you need, such as free and total chlorine, pH, total alkalinity, or calcium hardness. | Different pools and testing routines may require different measurements. A kit that omits a needed test can leave important water conditions unchecked. | Review the included test instructions and ranges. Buy compatible reagents for any additional tests you plan to perform. |
| 4. Match the method to your routine | Compare color-comparator kits, reagent-based digital photometers, and test strips for the number of steps and supplies each requires. | Comparator kits and photometers use reagents; strips generally use fewer separate supplies but still need proper storage and replacement. | Choose a method you can use consistently. Follow the stated sample volume, reaction time, and reading procedure every time. |
| 5. Inspect the kit’s reusable parts | Look at the condition and design of sample tubes, cuvettes, caps, comparators, and any measuring tools. | Scratched, stained, or dirty sample containers can make color readings harder to interpret and may interfere with some instrument readings. | Rinse containers as instructed after testing, avoid abrasive cleaning, and replace damaged or persistently stained parts when compatible replacements are available. |
| 6. Review instructions and reading ranges | Check that the directions explain sample handling, reagent amounts, waiting times, result units, and what to do when a reading is outside the scale. | Clear instructions help reduce user error and make results easier to compare with pool-care guidance. | Keep the instructions with the kit. Use the specified sample size and timing, and follow the kit’s guidance for results above or below its range. |
| 7. Estimate ongoing upkeep | Consider the cost and availability of replacement reagents, strips, batteries, or other consumables over the time you expect to use the tester. | The purchase price alone does not show the long-term effort or cost of keeping a tester ready for routine measurements. | Track remaining supplies, check expiration dates periodically, and follow any cleaning, battery, or calibration instructions supplied for the tester. |
Always follow the specific tester and reagent instructions. Availability, storage conditions, and replacement intervals vary by test method and product.
A tester should suit the pool it will actually measure. Outdoor pools face sun, splashes, and frequent handling; a sturdy, water-resistant body can better withstand daily use. Check whether the probe is replaceable and whether the meter supports the chemistry you monitor. A Pool Ph Tester designed for a small residential pool may not offer the range or durability needed for a busy facility. Small details matter.
The CDC’s analysis of 84,187 public-pool inspections found that 12.1% resulted in immediate closure; disinfectant violations were among the common problems. These figures concern inspected public pools, not every backyard pool, but they show why dependable testing matters. A digital display can look reassuring while a worn or poorly stored probe gives misleading readings. It is easy to focus on features and forget upkeep.
Tip: Match the tester to your pool type, expected testing frequency, and storage conditions. Look for clear calibration instructions, replacement parts, and a stated operating range. For frequent use, choose a robust meter that is comfortable to hold with wet hands. For occasional checks, a simpler tester may be more practical. Check twice. Record readings, and compare them with a suitable reference test from time to time. If results keep drifting, inspect the probe before trusting the number.
Practical priority guide for comparing testers. Ratings are editorial guidance, not product-test results; choose a tester that measures the water parameters your pool needs.
Check durability, clear readings, and ease of maintenance, then confirm the tester covers the parameters relevant to your pool type and sanitizer. Follow your pool-care guidance for target levels and testing frequency.
A low purchase price can be misleading if a pool water tester needs frequent replacement parts. Check the cost of test strips, reagents, batteries, and any calibration supplies before choosing. For a Pool Chlorine Tester, compare the ongoing cost per test, not just the price on the shelf. A kit used several times a week may consume supplies quickly.
A cheaper device can become the more expensive option over one swimming season.
Consider how long the tester is expected to remain accurate and whether replacement components are easy to find. Digital models may reduce guesswork, but some require specific reagents or periodic calibration. Simple strip tests can cost less per purchase, though humidity or poor storage may affect their reliability.
Keep supplies in a cool, dry place, and follow the maker’s instructions for storage and use. Small details matter. It is easy to assume the lowest price is the best deal; that deserves a second look.
If you test often, estimate a month of supplies using your actual routine, including extra checks after heavy rain or frequent swimming. A small notebook beside the pool can help track how quickly bottles or strips run low.
A 90° infrared light scattering turbidity sensor improves water quality analysis by detecting how suspended particles redirect infrared light within a water sample. This measurement method provides precise turbidity readings for wastewater treatment, environmental monitoring, and industrial processes, helping operators identify changes in water conditions quickly. Compared with less specialized designs, its advanced fiber-optic light paths, refined polishing techniques, and software algorithms reduce the influence of ambient light and support stable measurements in challenging environments.
The sensor is designed for reliable operation outdoors, including locations exposed to direct sunlight. Its sunlight-compatible structure and minimal drift help maintain measurement consistency during extended monitoring, while the low proximity requirement of less than 5 cm allows installation in compact tanks, channels, and process lines. These features make it suitable for applications where surrounding equipment or limited space could affect sensor placement.
For practical maintenance, calibration requires only 30 mL of standard solution, reducing preparation time and material use. The compact sensor body is manufactured from durable 316L stainless steel to withstand harsh operating conditions. With RS-485 MODBUS output, it can transmit turbidity data to control systems and monitoring platforms, supporting continuous water quality analysis and more responsive process management.
Test strips are portable and fast. They work well before a morning swim. Color matching can become difficult under cloudy light.
Liquid kits often provide clearer readings for chlorine, pH, alkalinity, and hardness. They require clean containers and careful drop counting. Small errors matter.
Digital testers show numerical results within seconds. They can reduce color-matching problems. Sensors still need calibration, clean storage, and fresh batteries.
No. A dirty probe may show a confident but incorrect result. I once trusted a reading too quickly. That was my mistake.
Choose a tester covering your actual pool needs. A useful range may include pH 6.0–8.0 and chlorine 0–10 ppm. Wider ranges are not always better.
Test before opening and throughout busy operating periods. Home pools need consistent checks, even with fewer swimmers. Habits are rarely perfect.
Test the sample again with a different method. Keep a liquid kit for cross-checking digital results. Use clean cells, fresh reagents, and daylight.
Check expiry dates before opening bottles. Store reagents upright, tightly closed, and away from sunlight. Rinse tubes with clean water, then let them dry.
Confirm availability, shelf life, and compatibility with the test kit. Different methods may not share interchangeable reagents. Guessing can create unreliable results.
Temperature, calibration, battery condition, and sensor cleanliness can all affect readings. Follow the device instructions carefully. I sometimes forget temperature limits.
Choosing the right Pool Water Tester starts with identifying which measurements matter for your pool, such as pH, chlorine, alkalinity, or other water-balance indicators. Compare test strips, liquid kits, and digital testers based on the measurements they provide, how they work, and the level of precision you need. Check that the tester’s accuracy and measurement range suit your routine, and choose a format with clear instructions and easy-to-read results.
Before buying, consider whether replacement reagents are readily available and how much maintenance the kit requires. Think about the tester’s durability and whether it is practical for your pool’s size and testing frequency. Finally, look beyond the initial purchase price: ongoing costs for refills, upkeep, and replacement can affect overall value. A well-matched tester makes regular water checks easier and helps you make informed adjustments when needed.